|
|
|

I tend to go all out and start with a 400 x 400 image. Resolution should be set at 72 and the background should be black. The large size of the image gives me a lot of room to play--you're going to crop your mask later anyway.
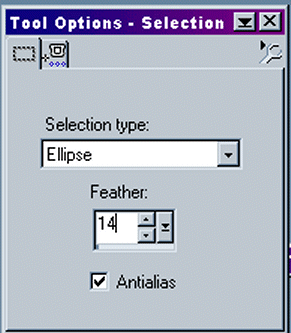
Now click on the selection tool on the left side tool bar (it looks like a box made of dashes). Open the Tool Options-Selection box. Be sure the tab with the little dashed box is selected, then use the pull down box and pick ellipse. Later you will want to play around with the selections. You can try the star shape, the arrow or whichever shape you like. One of my favorites is rounded rectangle.
Set the Feather to 14. Again, you can play around with this, but do 14 for now. The Anti-alias box may be checked. It doesn't matter if it is checked or not.
Now, starting about in the middle of your black box, draw a selection, leaving a distance to the border of the graphic.
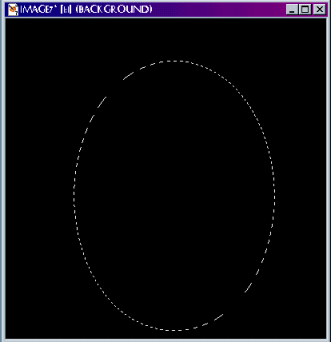
Now go to Selection, Modify, Feather and set the feather selection to 14. (You can play with feather selections also--the higher the feather number, the mistier the edges of your graphic will be.) Your selection may push against the sides of the box, but don't worry. You will be cropping it soon.
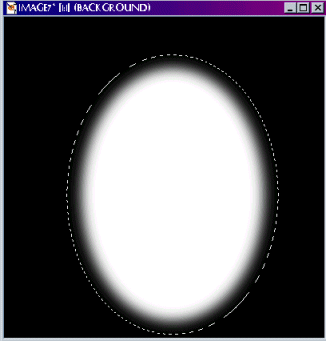
Switch to the eyedropper and select a good white from the color palette on the right. Then select the flood fill tool (the little bucket) from the left toolbar and dump the white into your selection. You will see that the white feathers out towards the borders of the selection, making it look like this:
Get rid of the "ants" again by going to Selection, Select None. Now you have a mask. Use you crop tool to center your mask. You may also crop it off center---the amount of balck around the white determines the size of your overlay graphic. An off-set mask will mask a slightly different part of the picture than a centered one. I like to crop my masks closely for most of what I do, but you will want to play around to see what works best for the application you have chosen.
Now look: you have made your first mask! Experiment with the various selections, the feathering, and the cropping. In no time at all you will be a master masker ;)
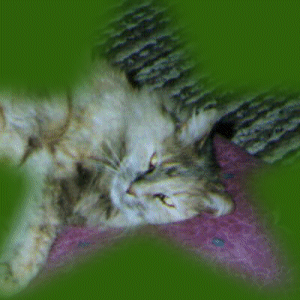
Here's a masked image of one of my little stars. It took a bit of playing to get her little face the way I wanted it. I then pasted it onto a dark green background:
 |
 |
 |
© 2002 PetVille Mentors. All rights reserved.