|
|
|
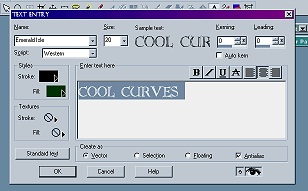
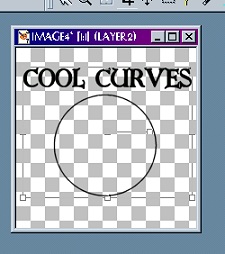
Select the Text tool and create your text. Be sure you have it set to Vector. You need to decide where you want to text to sit on the circle. If you want it on top, click the Center Text box, if you want it on the right, the Right Text, on the left, the Left Text.
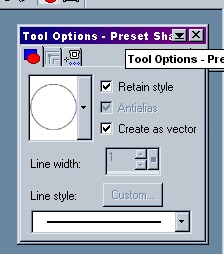
Next select the Preset Shapes Tool. It is the little blue box with a red ellipse. Be sure you have the Vector box checked. Since you want a circle, select Ellipse. DO NOT select one of the fancy colored shapes, it will not work.
Draw your shape in the box in which you have your text. You can move the shape in the box and pull on the edges to make it larger or smaller, just like vector text.
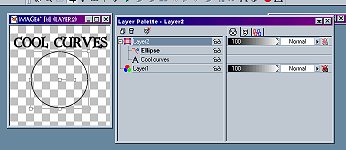
Now go to the Layer Palette box. You should see layer 1 with little glasses next to it. Click on the plus sign in the box next to it to open it up, and you should see your circle (or ellipse) and your text as two separate entities. If this shows, you are halfway there.
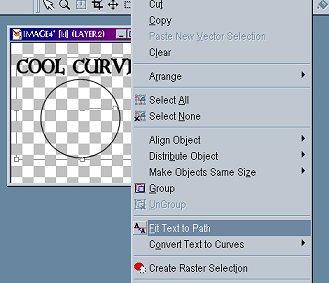
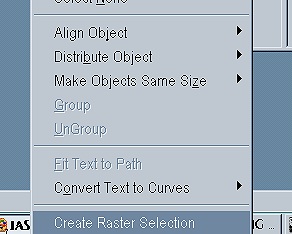
Now click the Vector/Object selection button. It's the small arrow in a box. For PSP 6 or below, hold down your CTRL key and click on first your text, then the circle. You will then see a faint outline of a square surrounding both of the vector objects. If you see that, perfect. If you don't then click in the upper left hand corner of your image, hold onto the mouse button, and drag the cursor to the bottom right hand side. This will let you select all of the vector objects in that image.
For PSP 7 don't hold down the CTRL key. Just click on your text, then your shape, then, starting at the upper left corner, hold down your mouse button and drag it to the bottom right to make a box around your vector objects. If this doesn't work, click on your text and your shape again, then try drawing the box again. It usually works by the second time. Whichever version of PSP you use, you will end up with an image that looks like this:
Now right click with your mouse to bring up a drop down menu. You will see an option 'fit text to path'. Clicking that will move the text onto the shape of the circle.
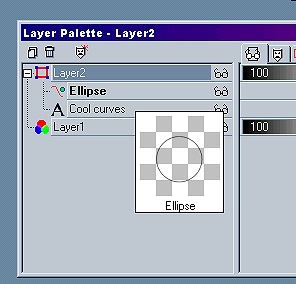
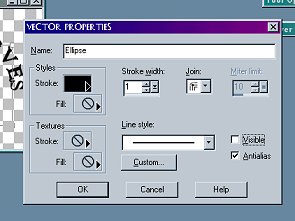
Once that's done go back to the layer palette and click on the word ellipse or circle—whichever you originally chose--so that it is highlighted. Right click that and in the drop down box select Properties. A Properties box will pop up. On the right there will be a check box marked 'visible'. Unclick this and your circle will now be hidden.
 |
 |
Now go back to the layer palette, left click on your text to select it, then right click. In the drop down menu, all the way at the bottom, you will see Create Raster Layer. Click that. Presto! You now have your text on a curve.
If you don't like where the text is sitting on the circle you can always turn it by going to Image, Rotate and choosing how much and which direction you want the text to rotate. In PSP 7 you will see a double image of your text, but when you copy and paste it onto whatever graphic you have made the text for, only the new, rotated image will paste.

You will have to play with this a bit to get it exactly the way you want it. The size and shape of the ellipse you draw determines the curve of the text. A little trial and error will get you what you want. Have fun!

© 2001 PetVille Mentors. All rights reserved.